Running and Editing Quick Reports
Running a Quick Report allows you to review and export various data points based on user activity. You can think of Quick Reports as reporting templates that have already been set up for you, allowing you to report on key pieces of data quickly. All Tasks – Last Month, Completed Tasks – Last 30 Days, and Missed Critical Tasks – Last 90 Days, are just a few examples of Quick Reports that you might choose to run. The best part about running Quick Reports is…it’s quick!
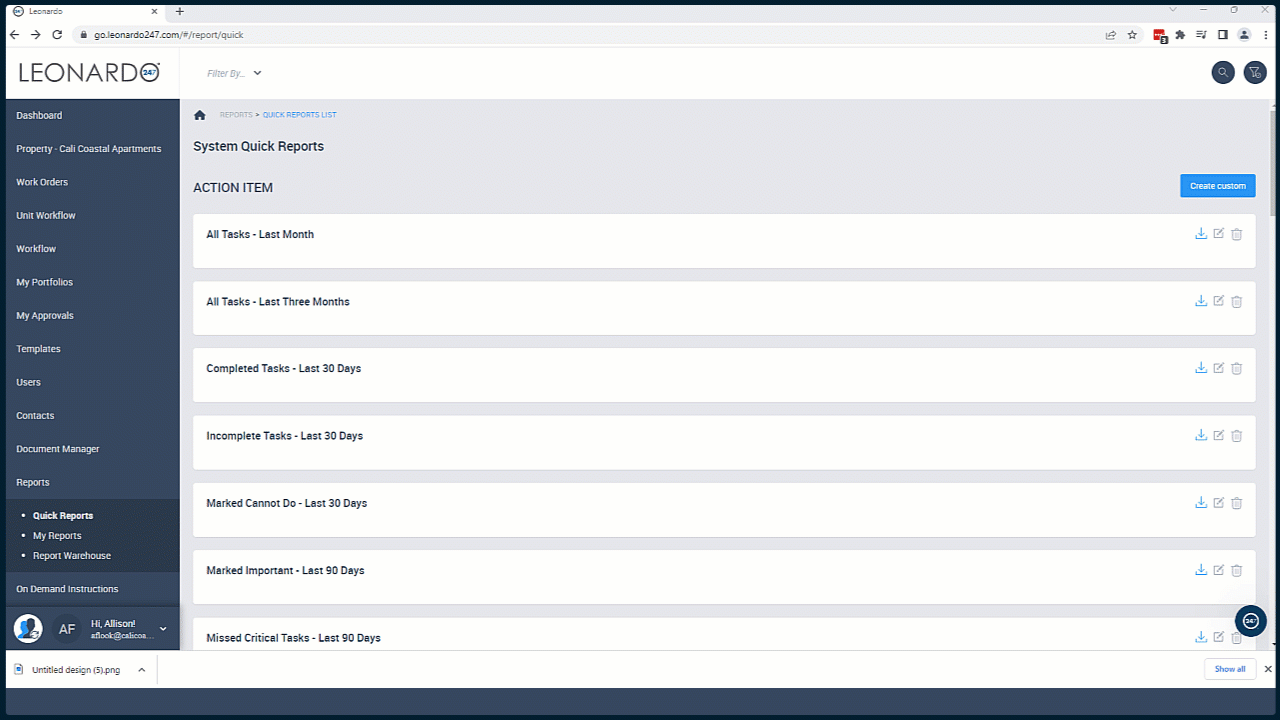
Choosing a Quick Report
Quick Reports are organized by category. You can either scroll through the categories or use filters to narrow your search.
- Select "Reports."
- Select "Quick Reports."
- Find the report you wish to run.
- Click the button with the downward-facing arrow to export.
- Name the report.
- Choose the format for the exported report.
- Add email addresses based on who you’d like to send the report to (optional).
- Add a message to show up in the email body (optional).
- Select "Export."
Changing What Appears in Report Data
There may be instances where you want to add or remove data columns that display on the report. To do this, you will use the "Fields to Show" filter and adjust which items show up in the Available Columns vs. the Visible Columns. Any item in the Visible Columns section will show up on the report.
- Click on the name of the Quick Report.
- On the "Fields To Show" filter field, then select the dropdown arrow.
- Click on the item you wish to move.
- Use the up and down arrows to change the order.
- Use the left and right arrows to move an item from the Available Columns section to the Visible Columns section, or vice versa.
- Click "OK."
- Click the magnifying glass icon.