
Creating Folders
Existing Folders in the Library
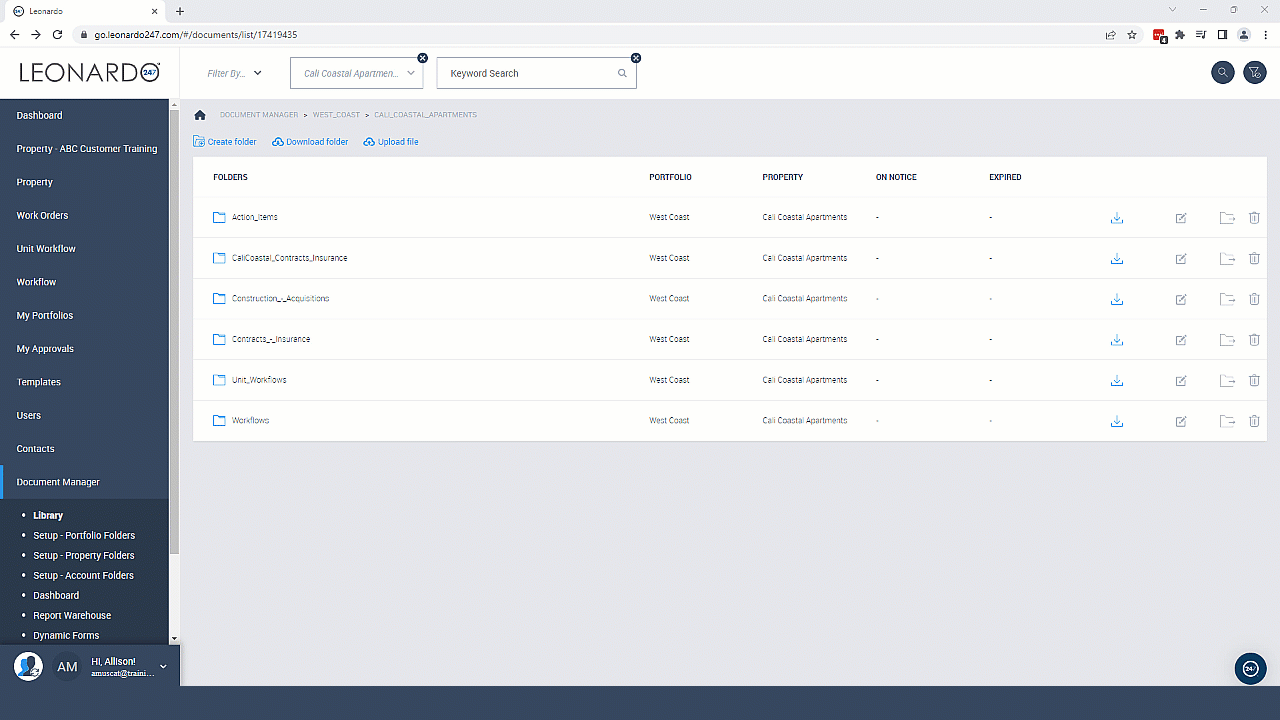
The library will have certain folders and subfolders that are automatically populated.
Action Items, Unit Workflows, and Workflows Folders
In your property folder you will see folders for Action Items, Unit Workflows, and Workflows. These folders contain either the dynamic form or note left when completing the item.
Insurance, Contracts, and Acquisitions Folders
Other types of existing folders include Insurance, Contracts, and Acquisitions. Within these folders you will find related subfolders for the most common third-party services used onsite. Use these folders to directly upload your contract and insurance documents.
Creating Folders in the Library
Creating folders in Document Manager allows you to organize your documents even further. Folders also give you the ability to require certain documents to be uploaded, and the option to limit visibility an editability to the folder.
To create a folder:
- Navigate to the section where you'd like to create a folder.
- Click the "Create Folder" link.
- Select options for requirements, visibility, and editability (see the section below.)
- Click "Create."
Create Folder Details
Review each field found on the "Create Folder" form to better understand their meaning and purpose.
- Name: Name of the folder you are creating.
- Has requirements: If you'd like to set a reminder to upload specific documents to this folder, selecting "has requirements" will prompt you to add a file name that reflects what should be uploaded (i.e., an insurance certification, contract, or employee HVAC certification. Think of the file name as a description; it does not have to be the specific file name used when uploading the document.
The "has requirements" flag will then set a Missing Document alert to the Dashboard until it has been uploaded. It will also display under Document Alerts on the Workspace, depending on the visibility and editability selections you make next. - Limit Visibility by Roles: Only users with the selected role(s) will be able to edit this folder.
- Create: Click "Create" to save your folder settings and create the folder.
Editing a Folder
Throughout the Library you will see the edit icon which looks like a piece of paper and pencil. Based on user permissions, the edit icon will either appear blue (enabled) to allow changes otherwise the icon will appear grey (disabled), which means you do not have sufficient permissions to edit the item.
Cascade to Subfolders
When selected, the cascade to subfolders checkbox will automatically apply the same options you selected for both "Limit Visibility by Roles" and "Limit Editability by Roles" to existing subfolders. Since the subfolders must exist prior to using the cascade to subfolders checkbox, you will need to first create your subfolders, and then edit the folder housing your subfolders so that the cascade to subfolders checkbox is selected.